How to Compress an Image to an Exact KB Size?
You have a photo to upload for a job application, a university form or a passport, and the form says the photo must be under 50 KB. Your phone photo is 3 MB, which is sixty times too big. If you upload it as it is, the form rejects it. If you shrink it the wrong way, the photo becomes blurry and the form rejects it again. This happens to almost everyone who applies for a job or a document online in Pakistan.
This guide shows you how to compress an image to an exact KB size step by step, what quality means, and how to keep the photo clear while making the file small. It also explains the difference between file size and picture size, and which format to use. The free Image Compressor on this site does the same job in your browser in seconds, with no signup and no login, and your photo never leaves your device.
What Is the Image Compressor to Exact KB?
Image compression makes a photo file smaller by removing some of the detail the eye cannot easily see. A JPEG photo stores the picture as a grid of colours, and the quality setting decides how much detail is kept. At 90 percent quality the photo looks perfect and the file is large. At 50 percent quality the file is much smaller, and most people cannot see the difference on a small photo. At 20 percent the file is tiny, but the photo looks blocky and blurry.
File size and picture size are different things. Picture size is the width and height in pixels, such as 4000 by 3000. File size is the amount of storage the photo uses, such as 3 MB or 50 KB. Making the picture smaller in pixels also makes the file smaller, but the form usually cares about the file size in KB, not the pixels. Our compressor changes the quality until the file fits your exact KB target, without changing the picture size unless you ask it to.
How Compression to an Exact Size Works
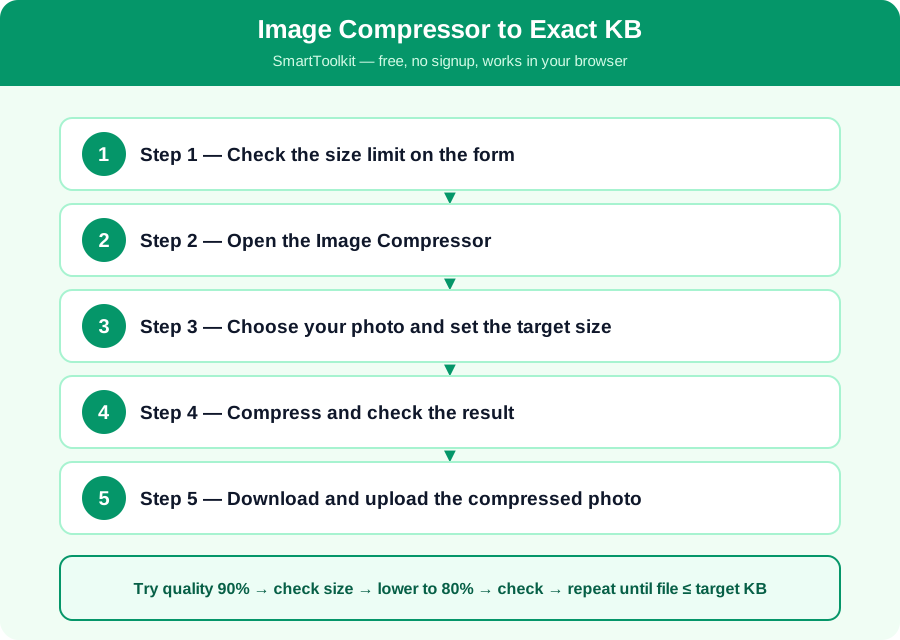
Try quality 90% → check size → lower to 80% → check → repeat until file ≤ target KB
The compressor works by trial and error, exactly as you would do by hand, but in a fraction of a second. It saves the photo at 90 percent quality and checks the file size. If it is still too big, it tries 80 percent, then 70 percent, and so on, until the file fits your target. Each step reduces the size by roughly a third, so a 3 MB photo usually reaches 50 KB in four or five steps. The lowest quality it will try is 10 percent, so a very large photo may need to be resized in pixels as well.
A photo that is mostly sky or a plain wall compresses much better than a photo full of trees or crowds, because smooth areas need less detail to store. That is why two photos of the same size can compress to very different file sizes. If your photo will not fit at a reasonable quality, resize it to fewer pixels first — a 1000 pixel wide photo is usually enough for a form, and it compresses far more easily.
How to Use the Image Compressor to Exact KB — Step by Step
Follow these five steps one by one. Each step builds on the last one, so do them in order and check your answer at the end.
Step 1 — Check the size limit on the form
Read the form carefully: it will say the maximum file size, such as 50 KB, 100 KB or 200 KB, and often the format, such as JPG. Write the number down. If the form also says a maximum width, such as 1000 pixels, note that too, because you may need to resize the photo as well as compress it.
Step 2 — Open the Image Compressor
Open the free Image Compressor on this site. It works entirely in your browser, so your photo is never uploaded to a server and never seen by anyone else. That matters for passport photos and ID cards, which you should never upload to a random website.
Step 3 — Choose your photo and set the target size
Click to choose the photo from your phone or computer, and type your target size in KB, for example 50. Check that the photo is the right one — a common mistake is compressing the wrong photo and uploading a stranger's picture by accident.
Step 4 — Compress and check the result
Click Compress. The tool tries lower qualities until the file fits your target, and it shows you the original size, the compressed size and the quality used. Look at the compressed photo: if it looks clear, it is ready. If it looks blurry, try a larger target size, or resize the photo to fewer pixels and compress again.
Step 5 — Download and upload the compressed photo
Click Download to save the compressed photo to your device, then upload that file to the form — not the original. Check that the form accepts it. If the form still rejects it, check the file size and the format again, because the form may want JPG and you may have a PNG.
Worked Example
Ayesha needs to upload a passport photo under 50 KB for a job application. Her phone photo is 2.8 MB, which is 2,800 KB. She opens the Image Compressor, chooses the photo and sets the target to 50 KB. The tool tries 90 percent quality and the file is 320 KB, then 80 percent and it is 180 KB, then 70 percent and it is 110 KB, then 60 percent and it is 48 KB, which fits. She downloads the 48 KB photo, checks that her face is still clear, and uploads it to the form. The form accepts it at once. If she had set the target to 20 KB instead, the quality would have fallen to about 30 percent and her face would have looked blurry, so 50 KB was the right choice.
Common Mistakes to Avoid
Mistake: Compressing the wrong photo. Always check the photo before you compress it, because uploading the wrong person's photo to a form is a serious mistake that is hard to undo.
Mistake: Setting the target too low. A 20 KB target can make a face blurry and unreadable, so use the largest size the form allows, not the smallest you can manage.
Mistake: Uploading the original instead of the compressed file. The download and the original look the same in your gallery, so check the file size before you upload, or the form will reject it again.
Mistake: Using a screenshot instead of the photo. Screenshots are often larger and lower quality than the original photo, so always compress the original photo, not a screenshot of it.
Frequently Asked Questions
What is the best KB size for a passport photo? Most forms ask for 20 KB to 50 KB for a passport photo, and 100 KB to 200 KB for a full document scan. Always use the size written on the form, because each form is different.
Will compression make my photo blurry? A little compression is invisible, but too much makes the photo blocky. If the photo looks blurry, use a larger target size or resize the photo to fewer pixels first, and compress again.
Is it safe to compress my ID photo online? It is safe if the tool works in your browser, because the photo never leaves your device. Our compressor works this way. Never upload an ID photo to a website that sends it to a server, because you cannot know who sees it.
What is the difference between JPG and PNG? JPG is best for photos, because it compresses well and the files are small. PNG is best for screenshots and graphics with sharp lines, but the files are much larger. For a form photo, JPG is almost always the right choice.
Why Use SmartToolkit for This?
You now know how image compression works, how to hit an exact KB size, and how to keep your photo clear while you do it. The rule is simple: use the largest size the form allows, and never upload an ID photo to a tool that sends it to a server. Use the free Image Compressor on this site — it works in your browser, needs no signup and no login, and your photo never leaves your device.
Use the Image Compressor to Exact KB — free, no signup, no login, and your data never leaves your browser.